| Home | Newsletter | Locations | Diary |
|
Indexes |
|
|
|
Article Framing Up the ImageWe want to look at how we decide what area we take out of the wide area in front of us, into our image.
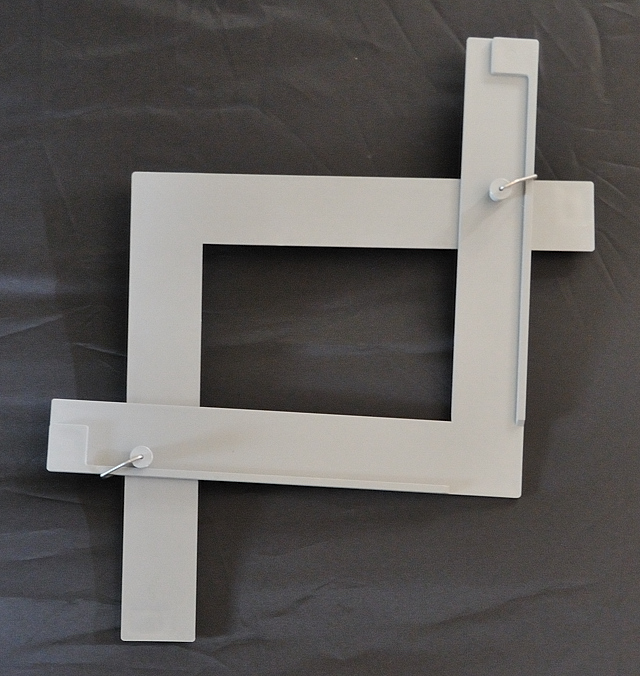
More recently I have created a set of frame cut outs, a set of these allows different view shapes, from square to long panoramas to be considered. In each of these cases, the objective is the same, to hold up a frame and by this means to be able to see what would, or could, be included within the picture.
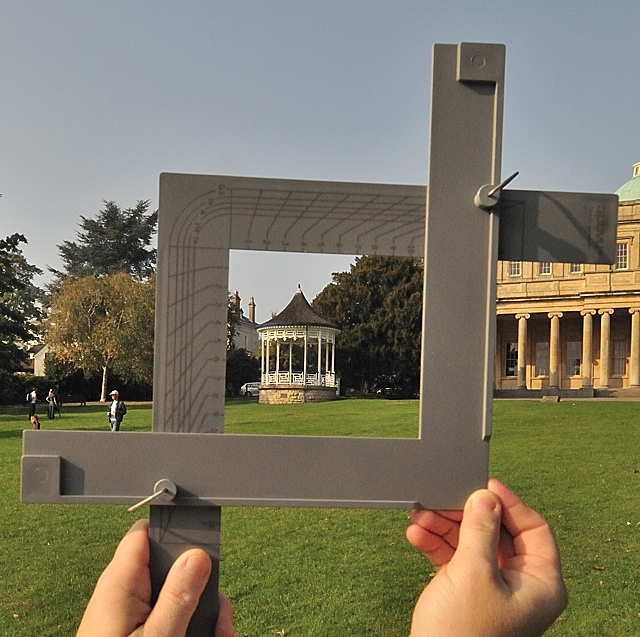
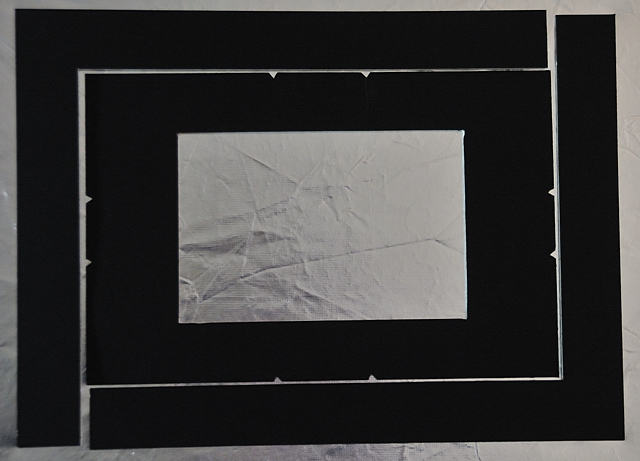
The artist's adjustable viewfinder in use Making Your Own Framing Aids We are going to look at how you can make TWO framing aids, from a piece of cardboard or mountboard and some elastic bands. You don't need a very large piece, so should be able to find something suitable at stationary shops, art outlets or from framing suppliers. In the example I am about to show you, I have used an off cut left out of the centre of a piece of mountboard when framing a photograph, but any piece that is A4 or larger will do. Mountboard is ideal as its quite strong, therefore the sizes of borders can be smaller than if you use a thin card. If you wanted you could use a side out of a cardboard box. The best coloured mountboard or card to use is either black or grey, as these are neutral and can better isolate the image without affecting the colours. Cutting out the two framing aids Out of this piece of card we want to cut:-
The photo above shows my pieces cut out, I decided to use 1.5 inch borders for my L pieces. Notice the arrangement so they are both the same size. The extra piece in the middle with the small nicks out of some parts you will see in use to look at the rule of thirds. If you need help to work out the inner
proportions on the rectangular piece, to be in proportion to your camera
sensor then click here,
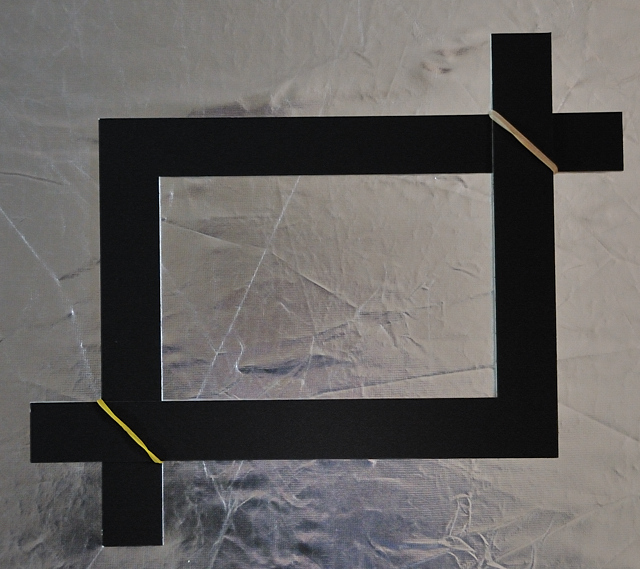
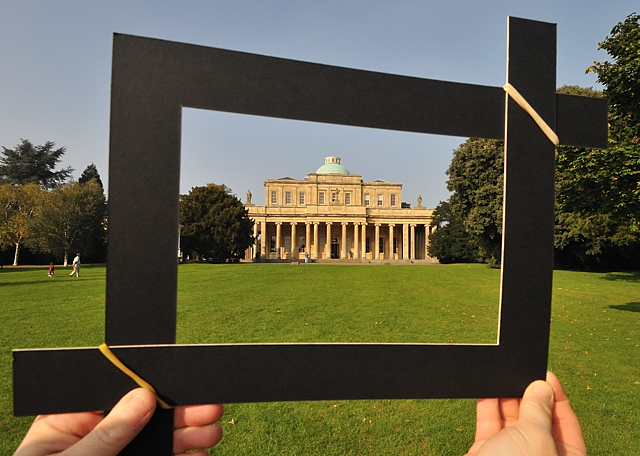
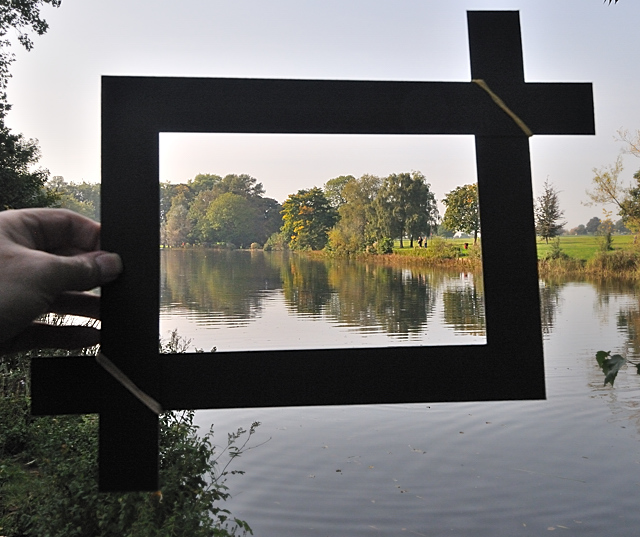
To start we are just using the two L shaped pieces. The two L shaped pieces are arranged in opposite directions and using two elastic bands you can adjust this to any proportion. You can, if you wish, mark on the borders different proportions so this allows you to view square images that will crop to 10x8, your cameras frame format, and a panorama format of your choice. For each shape you will need two marks, one on either edge.
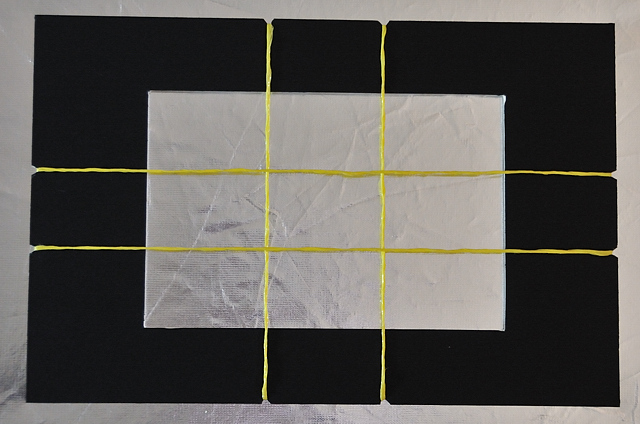
Now lets look at that extra piece of card in the centre
The rectangular piece, having had the centre cut out, calculate a third
of the way up and down the cut-out, and similarly a third from each end of
the cut-out, and in each case cut a slight nick in the outer edge. By putting
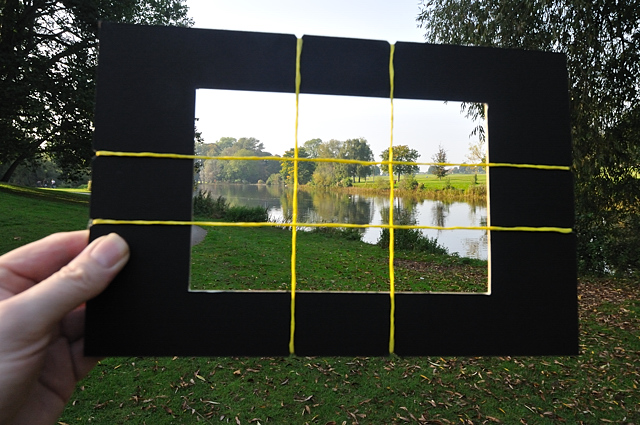
on 4 thin elastic bands, or using string and cellotape, and using the nicks to keep them in place, you have a viewing
aid, that not only allows you to see the cut out shape but see what, if
anything, is on the crossover points, a third in from each edge. If you need
extra help with this click here.
You will have a spare piece that you cut out of the rectangular piece and you could, if you like, make a second guide with this, either just smaller to be able to carry with you, or in different proportions. Using the Framing Aids We Have Created Unlike the
mirror composition exercise, To start with we want to look, as we did with the mirror, at different scenes, look at how you could select the photographs and how, by moving or making other changes, you could improve them. You will find it easier to view, if you close one eye.
Future Use This framing aid can be used in many situations in the future, but will usually be when looking at landscapes, scenic shots, photographing architecture or larger gardens. You could of course use it far more often, but realistically it will tend to be those occasions when you are stopping and spending far more time on a single individual shot, than one in a series of many. When using this, the aim is to cut down on the volume of photographs and increase the thought and quality. You are looking to get the right framing and image angle etc to produce that special exhibition print, rather than just filling up your computers disc as fast as possible. We can, if we like, also move on to an
advanced exercise
See Also:
Photograph composition -
introduction
|
||||||
|
||||||
| . | ||||||
|
||||||
|
|