| Home | Newsletter | Locations | Diary |
|
Indexes |
|
|
|
Article Project - 3D Two Camera Portraits with FlashThis is a far more complex project than the others we have looked at on 3D, if you haven't already try the others first, before you attempt this one. This project will not be possible for many just because they don't have access to the equipment required, but even if you cannot do it, understanding how it works should be of interest if 3D photography interests you. This project involves taking live action 3D, to achieve this we need two matched cameras that can be wired together. We cannot take 3D photos of moving items with a single camera. The second complication is that we are going to take the photos using flash, so we need both cameras to have their shutters open when the flash goes off. Once you have mastered this and the other projects in this series you should be able to take any 3D photos you want.
In order to do this you will need:-
The process is:-
I suggest that you set up the portrait
environment with flash units, reflectors, backgrounds etc exactly as
you would normally. See our
Lighting and Reflectors Section
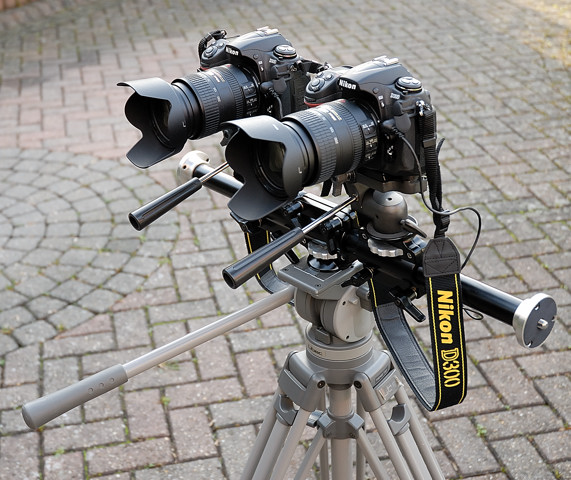
Set up the
tripod and dual camera bar and put on both cameras. The cameras need to be parallel and pointing exactly parallel or as parallel as you
can. I have discussed how to do this in
Taking
3D Images with 2 Cameras.
Use one camera only and set up
the
exposure,
From the settings you have and the
distance to your subject you can work out the stereo base, see
3D
Photography Stereo Base
You can now connect the two cameras
together with a special wire, and you need to set both cameras on manual
and the synchronisation of the flash so that both shutters are open when
the flash fires. This is covered in
Taking
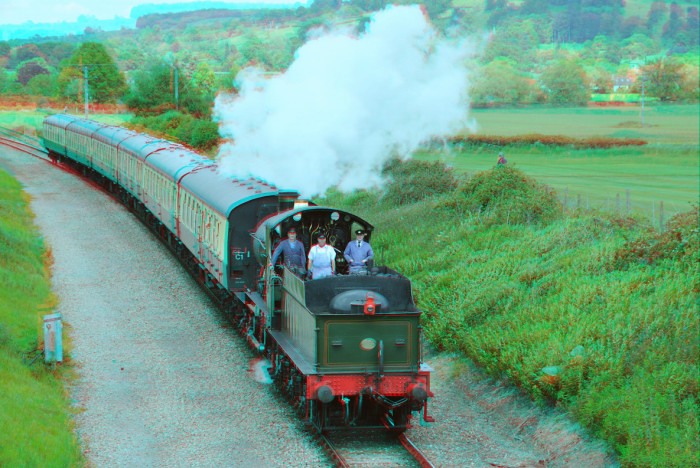
3D Images with 2 Cameras. You are now, in theory, able to take 3D portrait photos. Take one and check you have two images that have registered the flash, and then go on and take a number of others. I would suggest you put a marker in the shot every so many photos this could simply be someone holding up a card. You will find this makes it far simpler to match up pairs of shots and to sort out any problems that have occurred. Putting the 3D images together is exactly the same process as with the other projects. The problems you are likely to encounter are just the technical ones of cable connections, both cameras firing, cameras having their shutters open while the flash goes off and the need to keep the two with the same settings. If you are getting flash synchronisation problems just stop and draw some little diagrams for yourself of what the different cameras are set on and when in this sequence the flash will go off, and you are likely to see a solution. What have we achieved You will have discovered that operating two cameras together and getting the ideal results is a lot more difficult than twice that of a single one, but hopefully you will have some 3D live action photographs. Maybe with this experience behind you, you may decide to take on live action 3D in a faster less controlled environment, how about steam engines or equestrian topics.
See Also our
3D Section
|
||||||
|
||||||
| . | ||||||
|
||||||
|
|