| Home | Newsletter | Locations | Diary |
|
Indexes |
|
|
|
Article Taking 3D Images with 2 CamerasThis article is part of a collection of articles on 3D photography, here we are looking at live action 3D using two cameras. This is by far the most difficult end of 3D and one of the most complex areas of any photography. The results can be well worth it. Before tackling this article it would be wise to take a look at:-
So we start this article by assuming that you have read at last the last two of the list above, and understand how you would take photographs with a single camera and how much you would have to slide a camera to take the images. Using two cameras requires you to be able to not only operate the two cameras, and allow for the stereo base shift, but to understand and control every aspect of what you do. The cameras for example must go off at exactly the same time for true live action 3D, and if you use flash then the flash has to go off when both cameras have their shutters open. Every change you make to one camera you are likely to have to make a change to the second, but not necessarily exactly the same.
On top of this we have more chance of equipment giving us problems like a camera head dipping on one camera, so that the two are not parallel, or lens creep occurring so one camera is at a different focal length or focus than the other. With so many things to think of and stay on top of, using two cameras is a lot more than twice as difficult as using one. So why, you may ask, are we going to all the cost and problems, and carrying so much kit, using two cameras where one could be used. The answer to this is that in some situations we want to capture live action in 3D and to capture this we need both photos in the pair to be taken at exactly the same time, for example a horse going over a jump, a steam train approaching us at speed, or a butterfly in flight. We can't take one photo move the camera and take a second in these situations. It might be for some situations we could construct a simpler arrangement of a frame into which two point and shoot cameras could be fitted with a fixed focus lens of a known focal length and for them to be fired together in some way, the cameras are at a fixed stereo base and items near not photographed, this is possible and some who take 3D photos of steam railways are happy with this. However this does not allow us the creative freedom and quality that we are used to when using our DSLR cameras, so here we are concentrating on achieving just that, everything that you can take normally you should be able, by one means or another, to take in 3D. To use two cameras you need:-
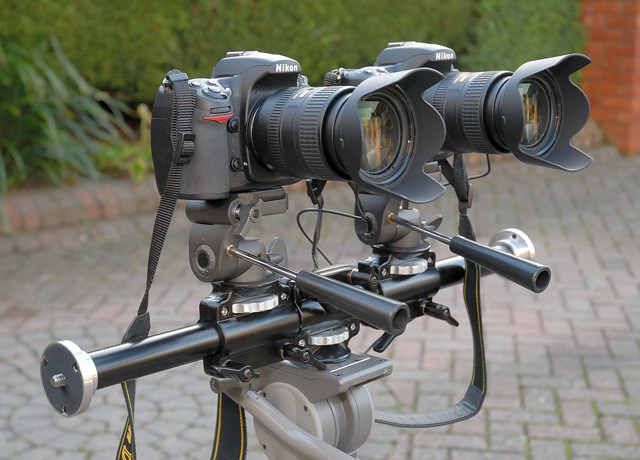
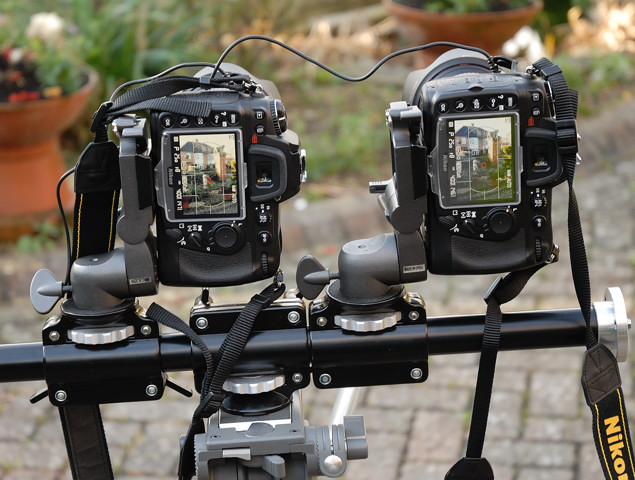
I use two Nikon D300 cameras, with matching lenses,
on a
Multi camera bracket, To set this up I need to point both cameras at exactly the same distant item, so zoom to maximum and use the grid or grid on liveview to get this right. Once this has been done, and the tripod heads adjusted, they are locked and you need to take care not to move the positions again. I can move the whole arrangement as there is another larger tripod head under the multi camera bracket. The tripod in use is a large one made for professional video recording. I can take off the head from the tripod and fit the multi camera bracket directly to the tripod, and in the studio I sometimes do this as this tripod runs on a dolly (set of wheels). Where I can't point at a far off item, for example when inside, I use a flat piece of material and using a short builders spirit level, I position the lens hood of both cameras against, and the spirit level to check the top edge of both hoods are level. This is not as accurate as the other method but close enough to produce good results. It is important that both cameras go off together, so you can't have anything set that will stop this, so for example set at least the second camera to manual focus, or so that it has shutter rather than focusing priority when taking. If you are using flash then you need to think about the shutter speed and flash setting so the flash goes off while both shutters are open, this is easily achieved by using rear flash and setting the shutter to be open longer on camera two than the first camera, the first camera being the one you are firing by pressing the shutter release. If firing a number of Nikon flashes with creative lighting you need to control this by using a controller on the first camera. Using rear flash and thinking about the shutter speeds is the secret to making this work. You will see that there is lot to think about and a lot to go wrong, and to make this a practical proposition when there are others about, time is limited and other problems have to be overcome, we need a fixed list of steps that we are going to use and to have worked this out in advance as far as we can.
A rough guide of these steps are:-
Like all photography, practice is essential, and things will get overlooked and go wrong, with so many possibilities of something going wrong in this case, you need a routine, and to have practiced this on your own where you are not under pressure or distracted. This all seems a bit much but at the end of the day the results can be magical, and worth all the effort.
See Also our
3D Section
|
||||||
|
||||||
| . | ||||||
|
||||||
|
|