| Home | Newsletter | Locations | Diary |
|
Indexes |
|
|
|
|
|
Article How to Photograph Waterfalls - 2
<< Back to how to
photograph waterfalls
Shutter Speed
Good waterfall photography includes an understanding of the effects of the
right
shutter speed
Generally we can produce the following emotional effects by adjusting the shutter speed.
To decide what shutter speed to use we need to consider:-
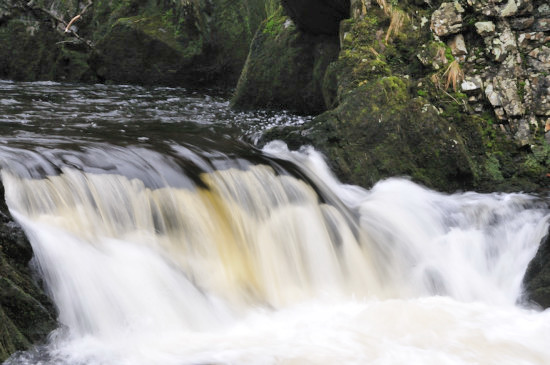
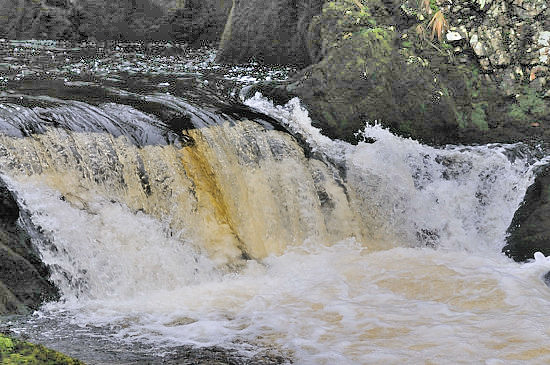
To get the same effect we need to increase the shutter speed when there is a large amount of water in volume or speed, where we are nearer to the waterfall or where the water is flowing from one side of the image to the other, and have a slower speed where we are further away, there is a lower volume or speed and the flow is directly towards us. There are two factors that have an impact here, the first is the same as speed generally in other types of image, the relative amount of movement within the image area. So when we are closer, the same particles of water travel further in our image area in the same time. Similarly faster flowing water will travel further in the time. The second factor is the amount of detail, so the larger waterfall with a lot more water has more detail that will be present/blurred by using a slower speed and to have some detail we need to increase the speed.
From this you can see that you cannot apply a formulaic approach and always use the same set of speeds to get the same effects. Close-ish to a small waterfall perhaps 1/50 to 1/80 would produce the realistic motion effect, while with a larger waterfall from further away, possibly around 1/180th would produce the same effect. With a very large waterfall like Niagara Falls it will vary greatly depending on the angle of view, the amount you have in shot and how close you are. The cotton wool type effects that you will often see in magazines are produced with slow shutter speeds, often in the range of 1/4 to 1/15 second. To get control of the speed you often also have to use a range of other features:-
To get to a long
exposure,
Using slow shutter speeds you need to take care not to loose all detail, and just end up with an image that is similar to one where the highlights are burnt out. It may be wise to always take a safety shot a little faster than the one you think is right.
Using long exposures can mean that other items in your photograph shows movement, for example animals, people or plants in the wind. In these situations to get the effects you want, with a longer exposure and not have unwanted movement, you can take two photographs with the camera on a tripod at two different shutter speeds and then using an editing program like Photoshop combine them so that the water is from one image and the rest from the second image. Often when travelling abroad, and in some cases in the UK, we don't have a tripod available. To get slower shots without needing a tripod use a stabilised lens like the Nikon VR series. It is also worth practicing when images are not important to master the technique of holding the camera still, often combining a good standing position when taking, and holding your breath. Camera movement does not show on wide angle shots, while telephoto shots are far more difficult handheld. Combining a VR and technique allows you more scope than many realize. It is for example possible, with practice, to hand hold a 400mm VR lens at 1/15 and get a perfect picture. Combined shots, where the effect is achieved by adding together two images, may also prove beneficial in some situations allowing you to have the effects of the flow, with added detail from a higher speed shot. Some cameras, like many of the Nikon DSLR's, have a multiple exposure facility that allows images to be taken this way, but where it is not available you can do it by merging the images in Photoshop or similar software packages. Higher shutter speeds can be used to freeze movement, so for example a canoe going through rapids with the canoe and every splash frozen in space.
Next :-
On to how to
photograph waterfalls 3 >>
<<
Back to how to photograph waterfalls
See Also the
Waterfalls Section
|
||||||||||||||||||||
|
||||||||||||||||||||
.
|
||||||||||||||||||||
|
|