| Home | Newsletter | Locations | Diary |
|
Indexes |
|
|
|
Article How to Photograph Old PrintsFor many situations, like then and now photographs that you only want to put onto a website, scanning is the simpler and quickest option, and this can be done with a scanner or many multi use printer/scanner/copier/fax systems. If however you want to go further than this and produce exhibition or show prints, then you will probably want a better quality image at a higher resolution than you can get from scanning. Photographing prints, be it photographs, drawings or works of art is not usually difficult providing a few techniques are used. With more challenging situations it is still possible to get good photos, and in this article we want to look at both the straight forward and less so. Straight forward photos and works of art that have a non shinny surface and are not behind glass are the easiest. So we will look at these first, splitting them into two groups, black and white as one and colour as the other. Including in colour any that have anything other than white paper with black image. Straight forward Black and White Put the camera above, looking vertically down, and make sure the image is square to all sides, usually this can be done using a tripod with a swinging or movable centre column that goes over to accomplish this or by just moving the head or one of the professional tripods that have this capability. Some tripods have a secondary head position under the tripod. If you have a 90 degree viewfinder attachment you will find this is most helpful. If you have the ability to, turn down the contrast, this will give you a better, if sometimes flatter picture, you can always add back contrast later. Set up two flash guns or one and a
Reflector, Frame up and focus the image, you can use auto focus or manual. If auto focus will not focus then put a piece of paper in front of the image with a more distinct image or increase the room lighting. Take the image and check the image/curve, adjusting and retaking if necessary. If you have a batch of similar images of the same size to take, then once you have one right switch to manual and reproduce these settings and use the same for each shot, moving the other images into position one at a time. If you find you have some colour cast do a conversion to black and white in your editing software. Some cameras have a setting to allow black and white photography, making this stage unnecessary.
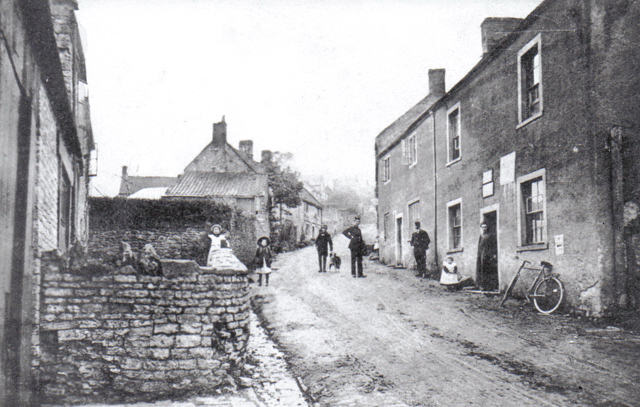
Chilcompton PO Then & Now, Chilcompton, Somerset
Straight forward Colour This is the same as with
black and white above, but we also have to set the white balance of the
camera, either to the appropriate setting i.e. flash, bulb etc, or better use
a grey card or
White Balance Target, If you are mixing black and white and colour then the white balance setting can be left alone as set for colour, but its then best not to use the camera setting for black and white photos, but to shoot in colour and then switch some images to black and white in editing later if necessary. With Nikon cameras if you are using RAW format to store your images, then images shot with the black and white setting and appearing as black and white shots can be switched back to colour afterwards.
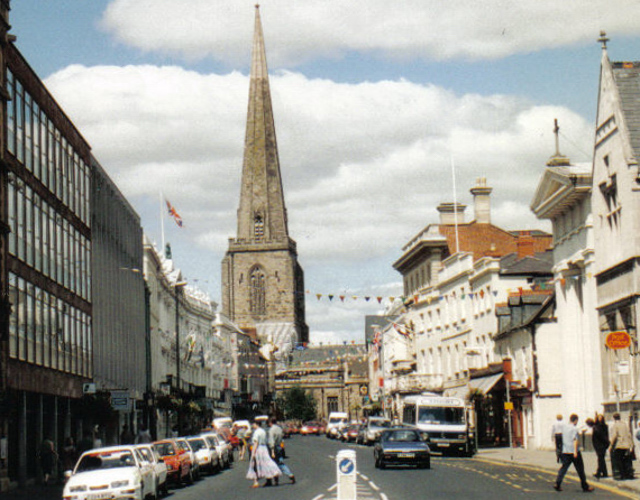
Market Day Hereford Then & Now, Herefordshire
Photographing images behind glass and other highly reflective surfaces. You will find there are three types of reflection, lights, camera and room. The lights can usually be positioned at an angle where the reflections cannot be seen. The larger problem is the other two, the camera, possibly photographer and room. Black does not reflect, so historically many photographers used black cameras and put black insulating tape over any logos or colours, stripes on the camera, dressed in a back outfit and used a large dark room minimising light reaching the ceiling. Putting some black cloth or matt black card around the setup, just leaving enough of a gap for the lens, can solve the problem. If the art is in a frame with a glass front on a wall, then shooting through the gap between two black back cloths on a background pole can be the simplest solution, you can use pegs, paper bulldog clips or similar to hold the material around the lens. With a long black background you will find you can double it over and have the top and bottom on the support bar. Often I
will put black side cards in, and control the camera from a cable using
either a
cable release,
If you are still having problems with
reflections then look at using a
polarising
In other respects these images are the same as the two classes above.
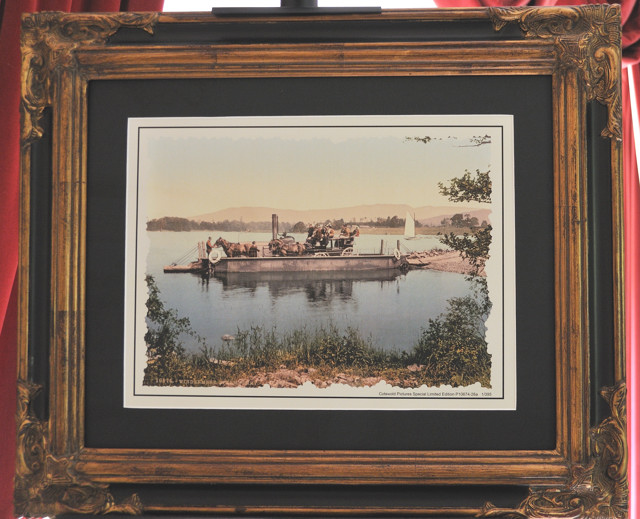
Framed Photochrome of a Ferry in the Lake
District - Problems of interference patterns Where two surfaces touch for example a shiny surface of a print against a glass sheet, you can get an effect that is like a series of rings developing. First load the image onto the computer and check, when looking at a full sizes image, this is really visible, there are times where it shows up in a jpg shown on the LCD screen but the RAW image has handled it correctly. If you still have it, see if there is a way of stopping the two surfaces touching, perhaps putting the frame on an easel or laying it down. See if you could take the image out or correct the framing problem.
You may be able to reduce, but probably not
completely eliminate the effects by using a
polarising
Paper texture showing up You may have seen some photos taken of art or prints and in these the paper surface has shown up. This occurs when the lights are at too low an angle. Similar to low light in a sunrise or sunset showing up every indentation in the ground, having lights too low can show up paper texture. Black and white diagrams When you photograph black and white diagrams you get a good copy of what you see. Often if its an old diagram it will have faded in places and look less than pristine. If you increase the exposure the lines get darker but the background starts to look grey. The solution is to increase the contrast on the camera, if you can, and if not to take the image and increase the contrast in editing. Oops, it has coffee cup rings or something spilt on your black and white diagram Maps and diagrams in use can get used to stand cups on, get items spilt on them or just change colour with age. One of the photography exercises I can remember being given at the British Army's University, the Royal Military College of Science, over 40 years ago, was a diagram on black on white paper that they had tipped some red ink over. The challenge was to photograph it and make the red ink go away. I remember doing this using a large camera with cut sheet film in it and selecting the ideal film with a very high contrast, and then hand spotting the negative to remove dust before printing a perfect image. None of this of course removed the red ink, but by putting a strong red filter on the lens in combination with this did. When shooting in black and white if you have another colour that you want to remove, then use a filter of the same colour as the item you wish to remove and this, in combination with increased contrast, will do the job. You will find coffee stains can be removed by experimenting with either tobacco grads and orange filters, in combination with increased contrast. By using a combination of filters you can remove more colours and end up with selective colours only, but I had better not say more or I will give away how to make a set of bank note plates! While historically we have done this at the photography stage, if you photograph in colour there is no reason why you cannot do this in editing later, where you probably have far greater control over the colour of filters in use. Colour replacement in Photoshop also allows you to change one colour to another.
|
||||||
|
||||||
| . | ||||||
|
||||||
|
|